Git
How to use GIT
Gitea
How to work with gitea
Sign-In to gitea
For example: https://gitea.voser.cloud/user/login
You may be prompted to change your password when you sign-in the first time.
Create your first Repository
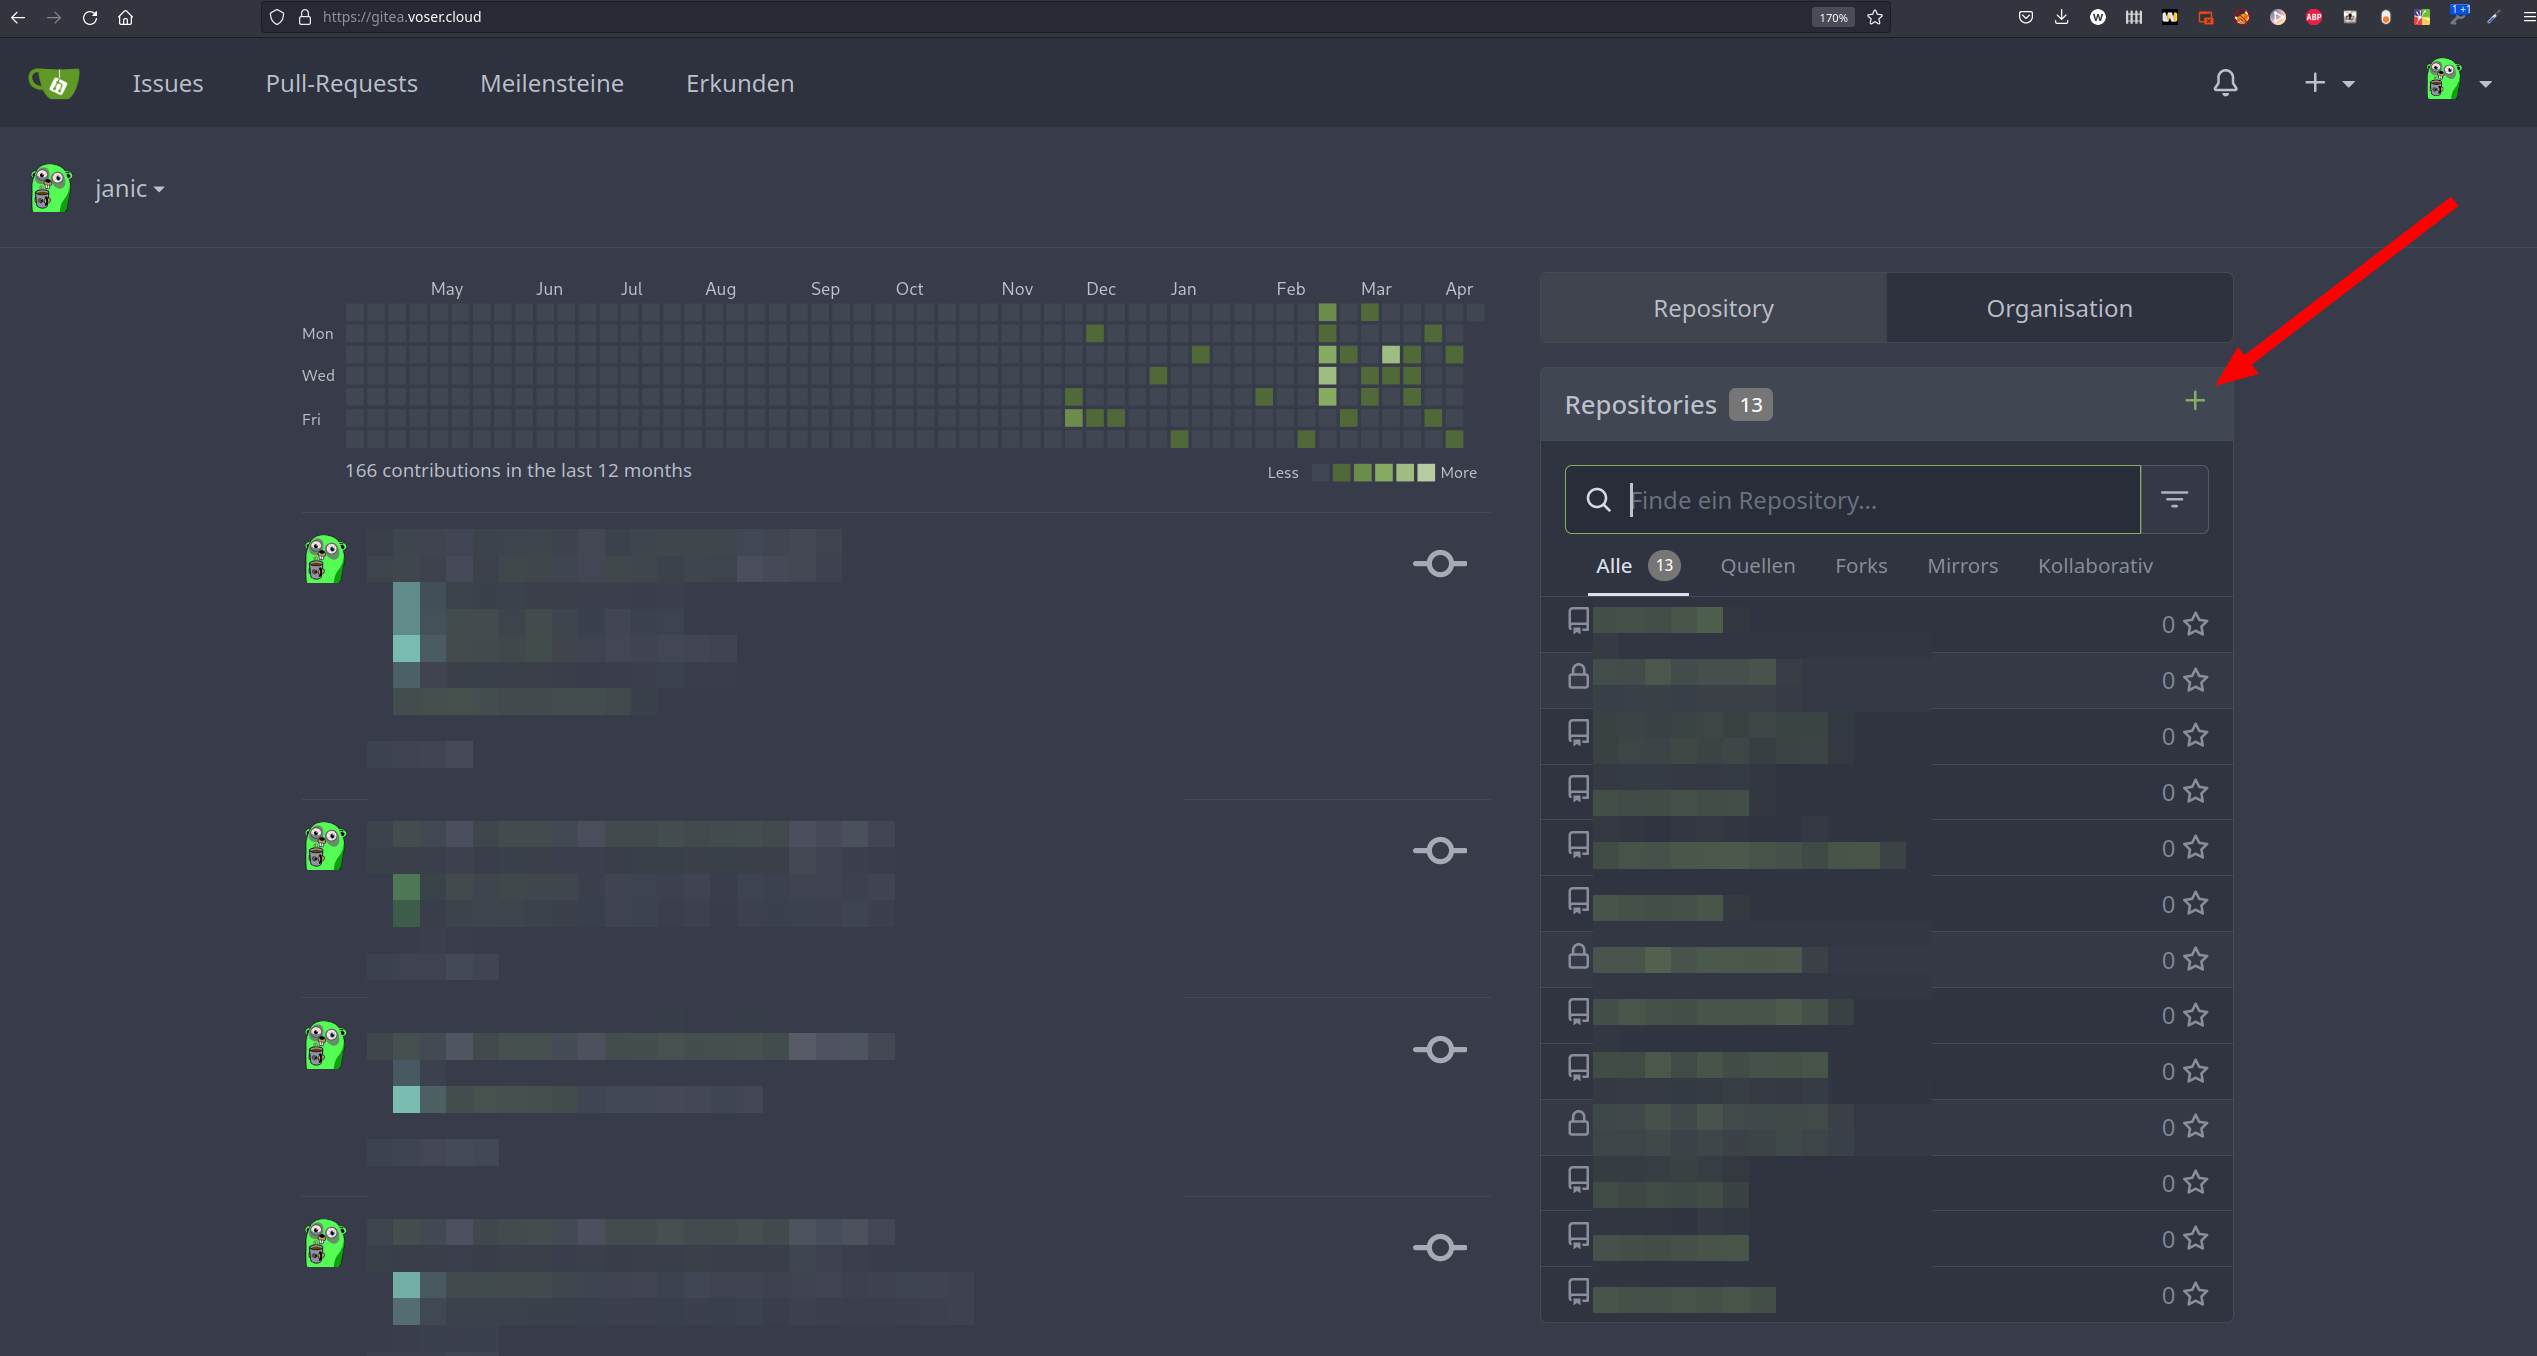
Create a new Repository
When you are logged in you can just click on the "+" sign on the right side of repositories.
Configure Repository
Here you find all the settings described.
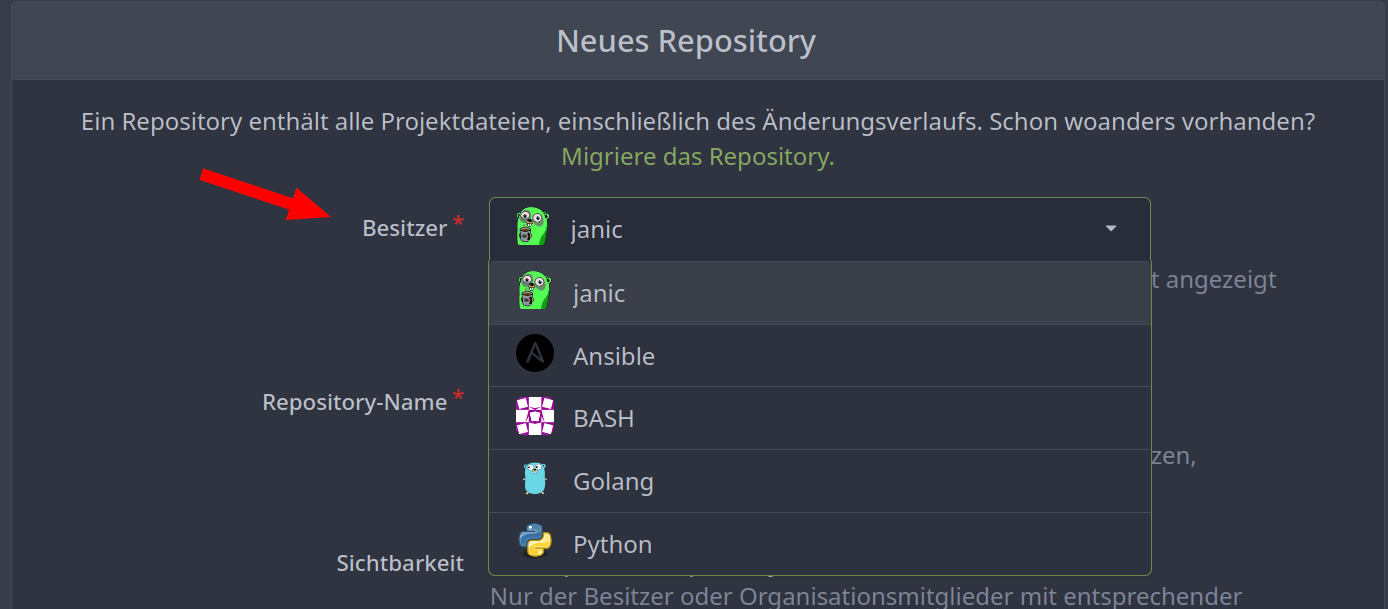
Owner
Select the owner of the Repository, you can either select your own user or a organization, where you have the rights to create a repository.
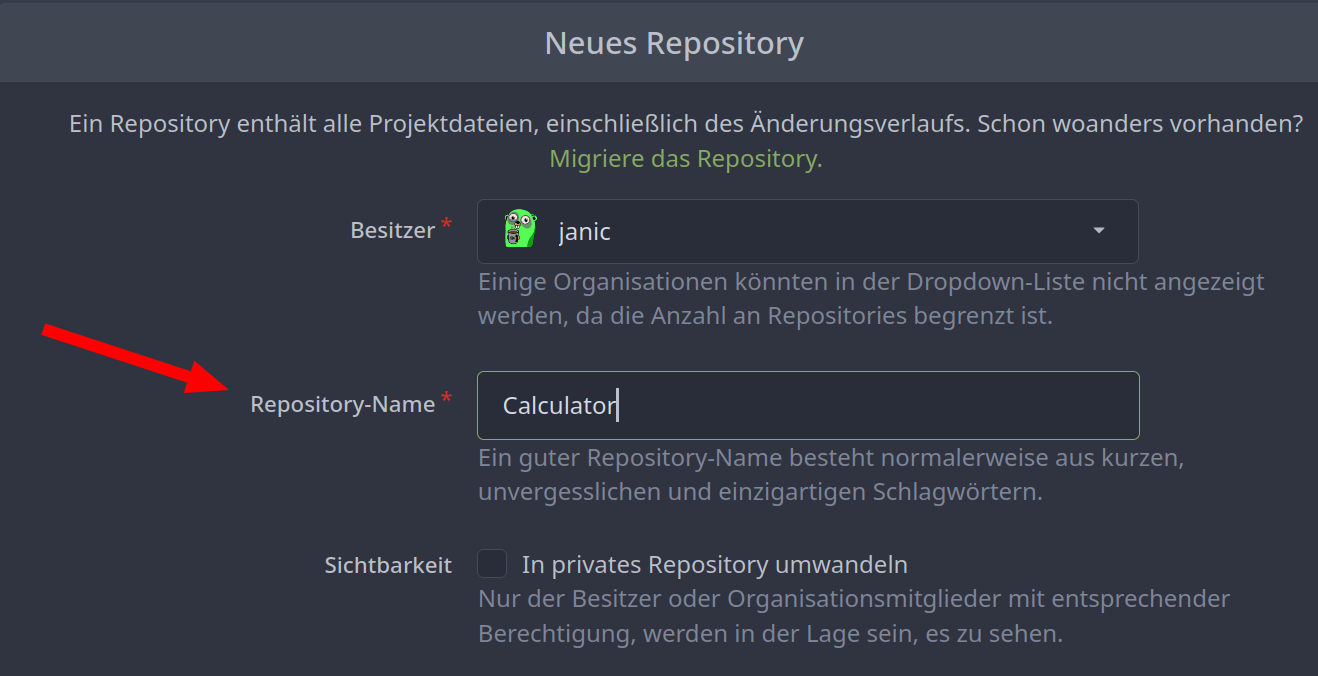
Repository-Name
Select a name, this can be anything.
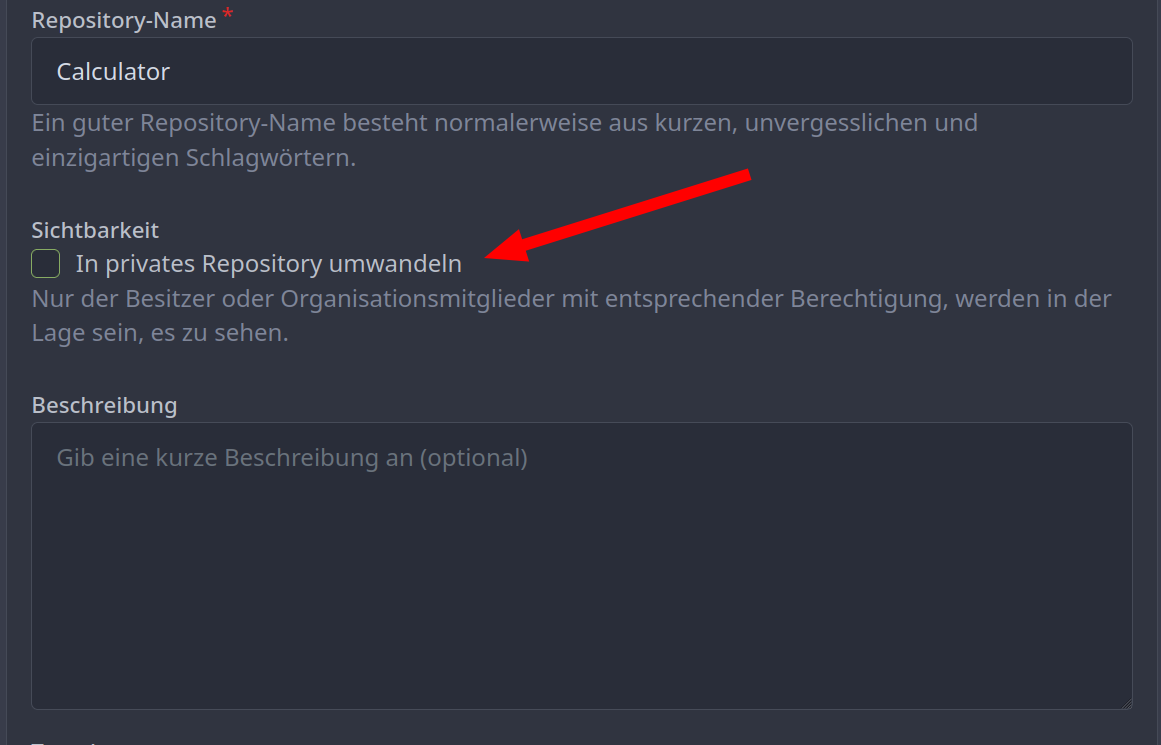
Private Repository
If your repository contains sensitive data, you should set the checkbox for private repository. If this checkbox is not set, everybody with access to this website could read your code. If you set this checkbox, only you and administrators can see this repository.
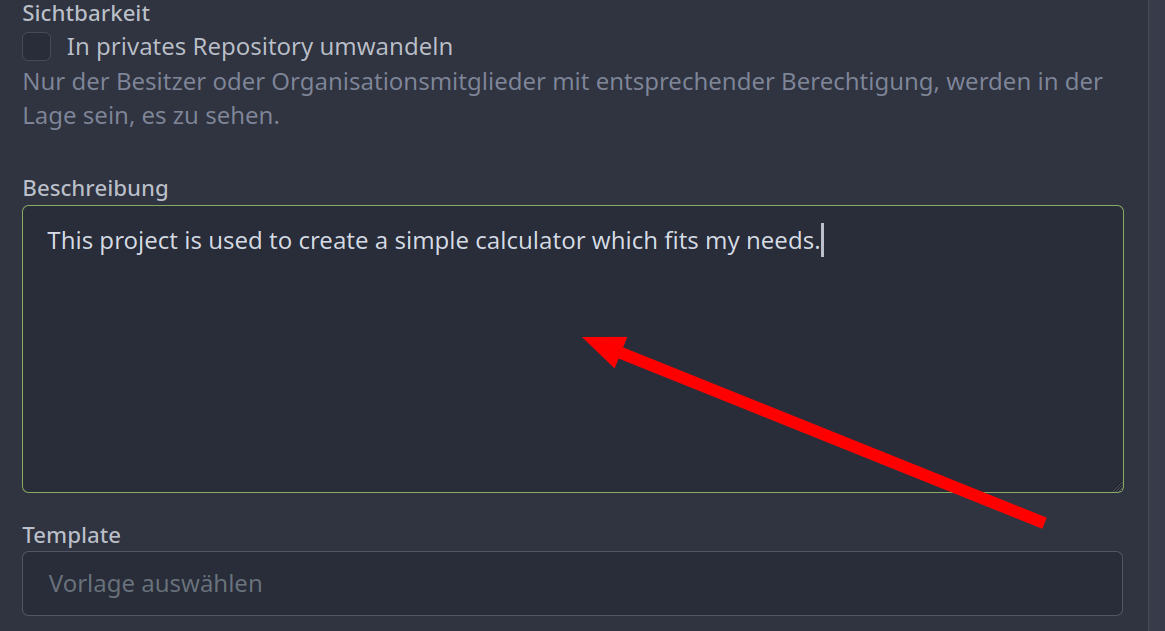
Description
This description gets written in the README.md, this can be changed late, type a descriptive sentence.
Template
If you would have a template repository, you could use this as base. If you have none, just the default will be used.
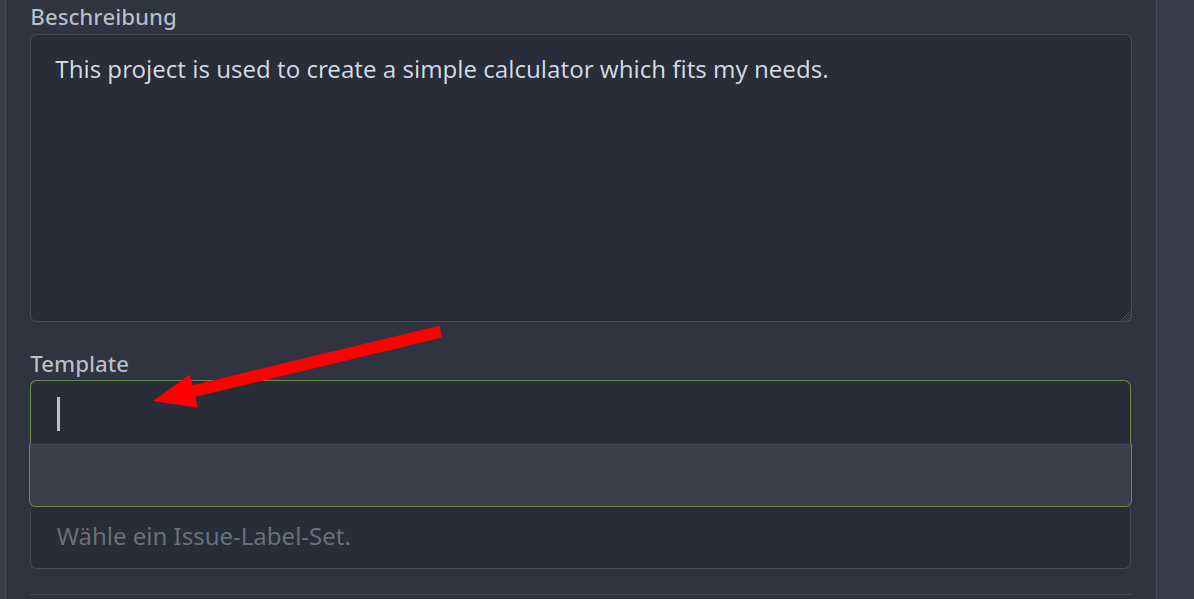
Issue Label
The Issue-Label-Set is used when creating a Issue, you can categorize the issues with the following tags. Just select the default.

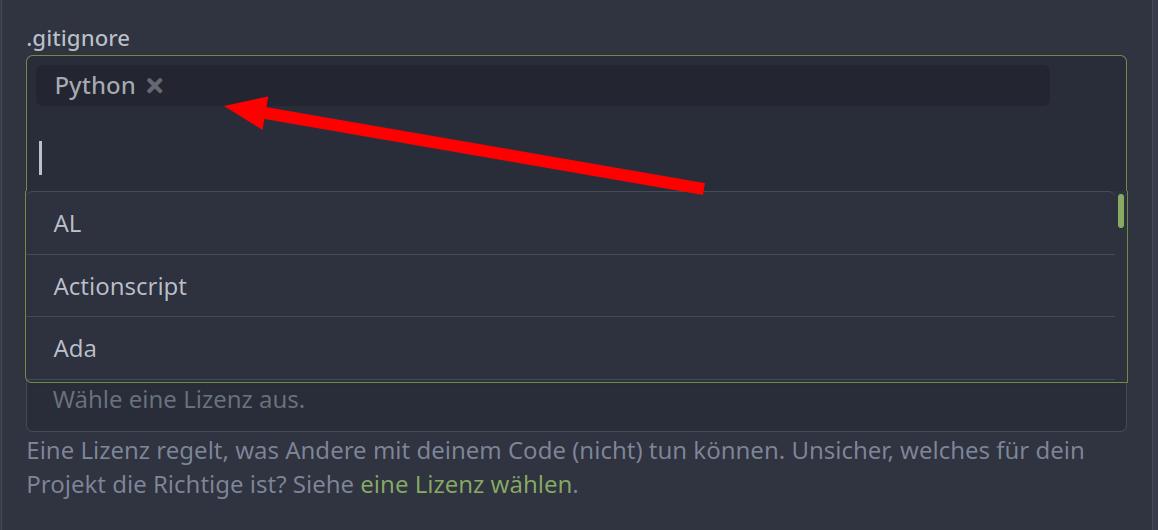
Gitignore File
The .gitignore file is used to ignore some files like build binaries and cache or sensitive date. All the files defined in this file do not get uploaded to your git repository. My recommendation is to just select the default for your programming language, you can adjust this on every commit.
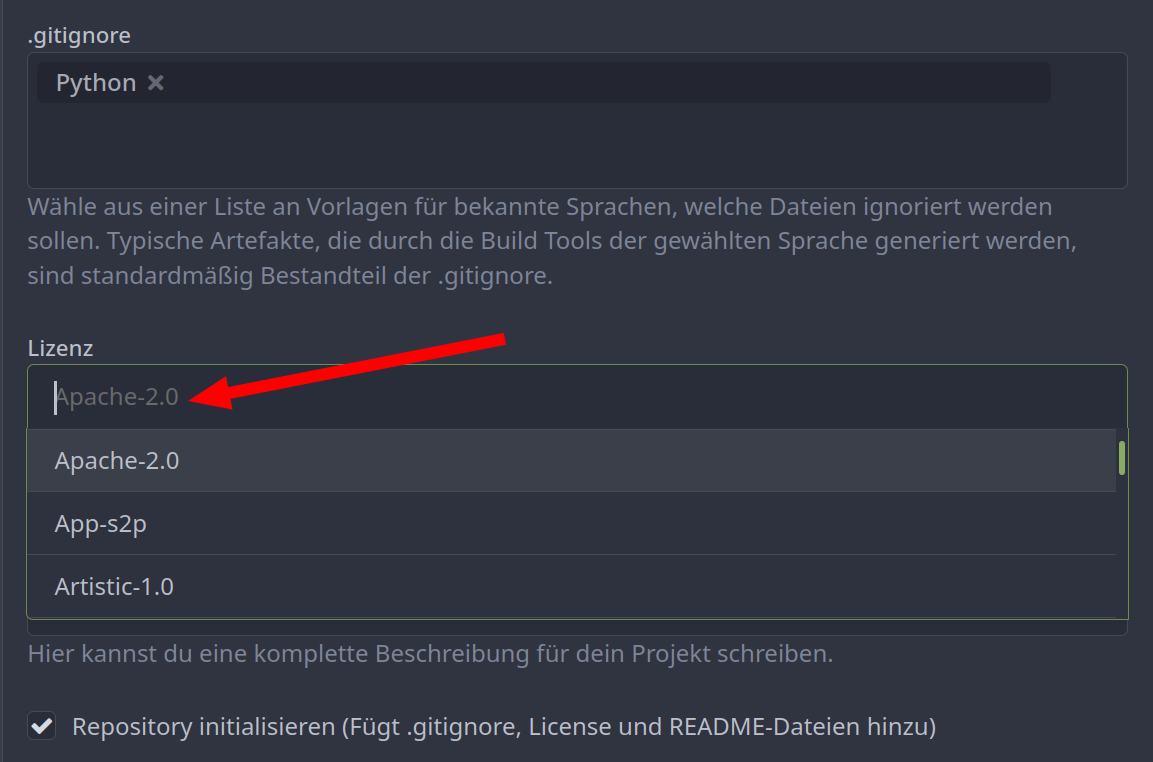
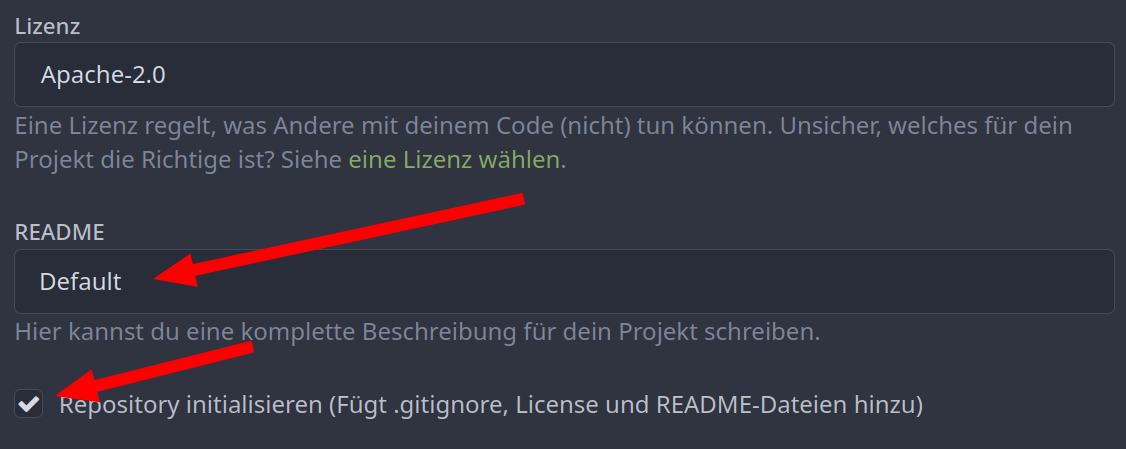
License
To protect your intellectual Property you can select a license for your repository, my recommendation is to use Apache-2.0.
README
The README file is a markdown file in your repository, which has the description in it. you can customize this to your needs.
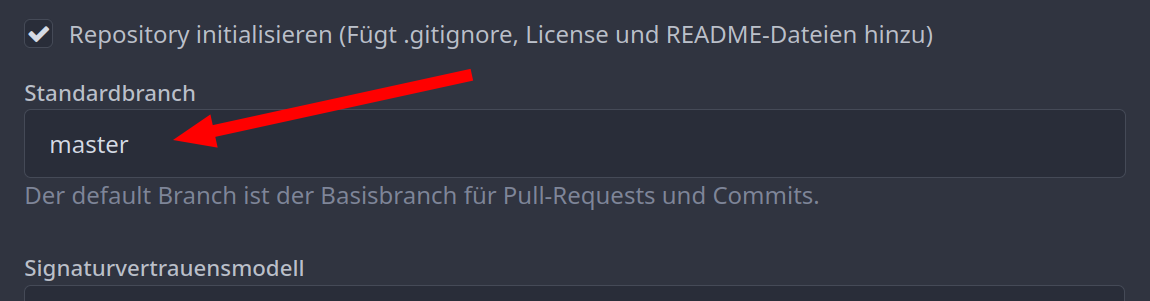
Additionally check the checkbox to initialize your repostitory, otherwise it will not create the files.
Defaultbranch
The default branch describes to which branch the push request are getting routed. Use master for default.
Default trust model
The default trust model describes how the trusts are related. Use the default.
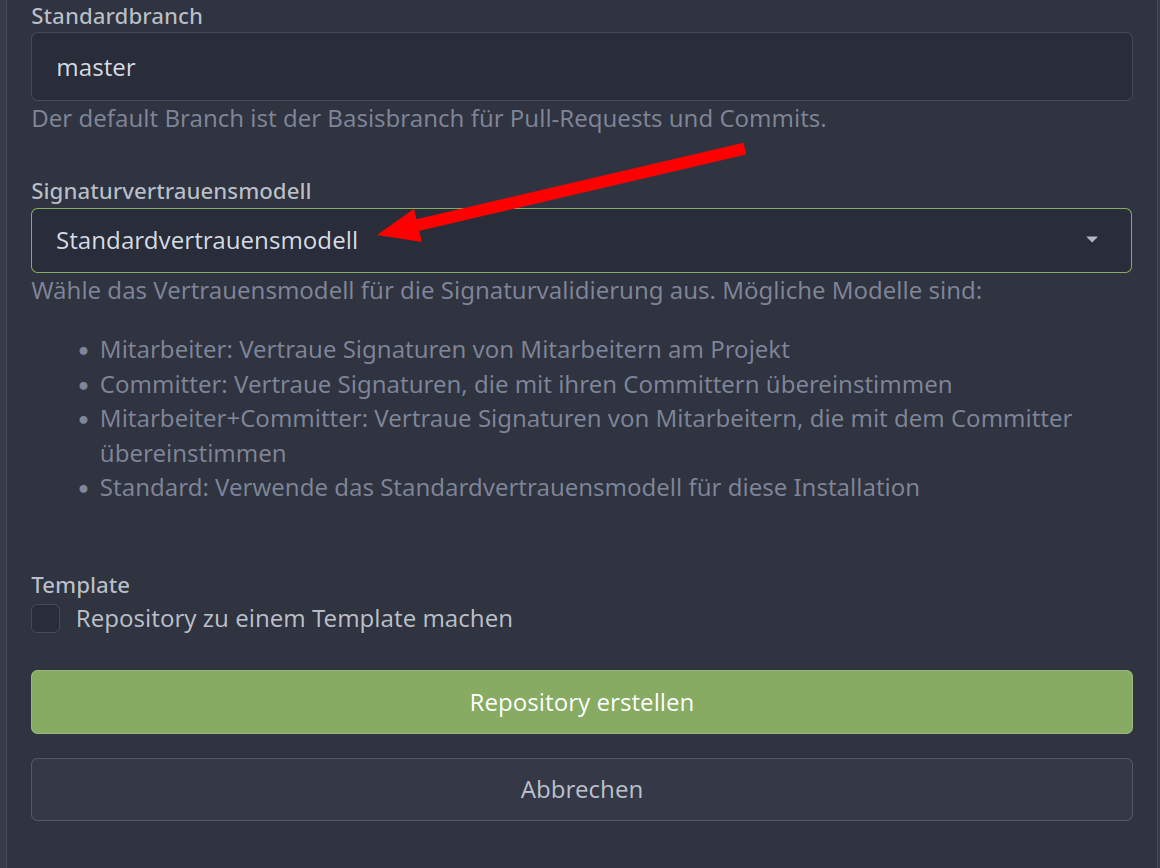
Template
You could convert this repository settings to a template, but remember a template can not be edited. If you just want a Project to work on do not check this box.
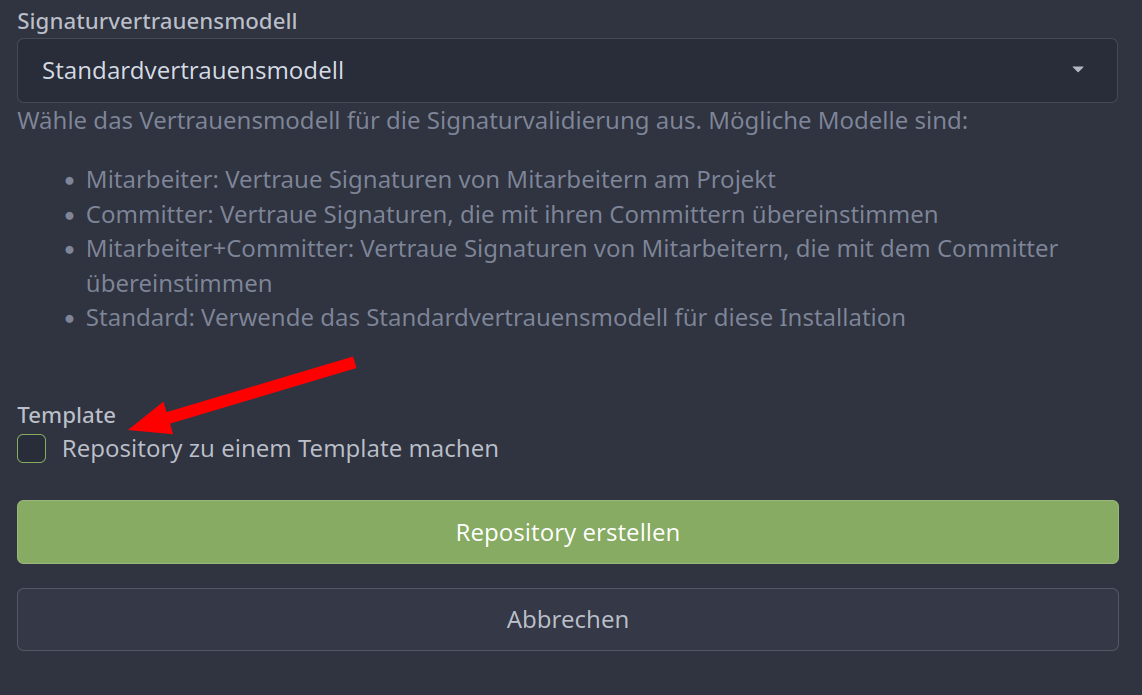
Afterwards click on "create repository".
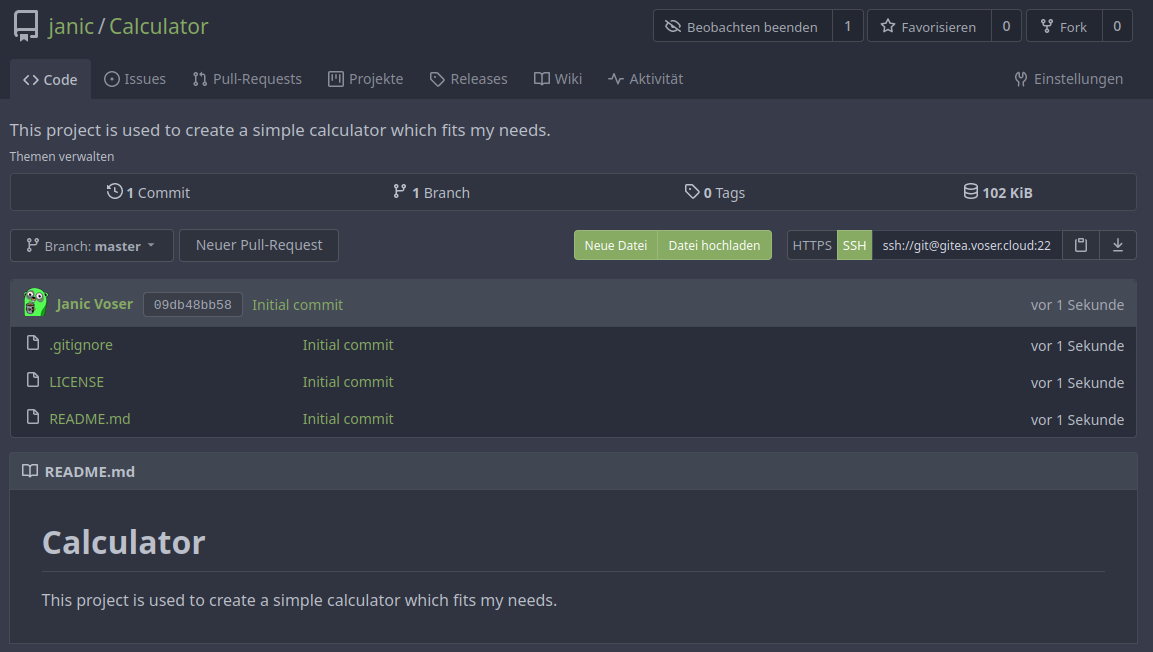
The final result
The final result looks something like this.
Configure Workspace
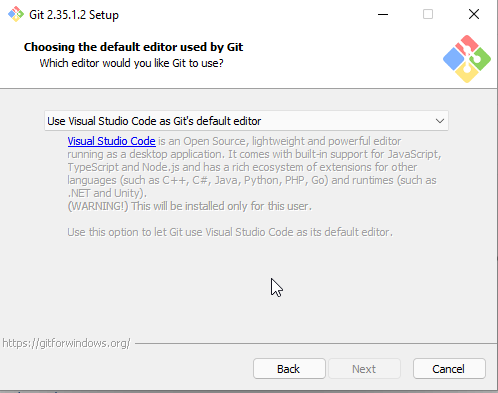
Install git for windows (Git Bash)
You can use everywhere the default settings except for the defualt editor, select there "Use Visual Studio code as Git's default editor"
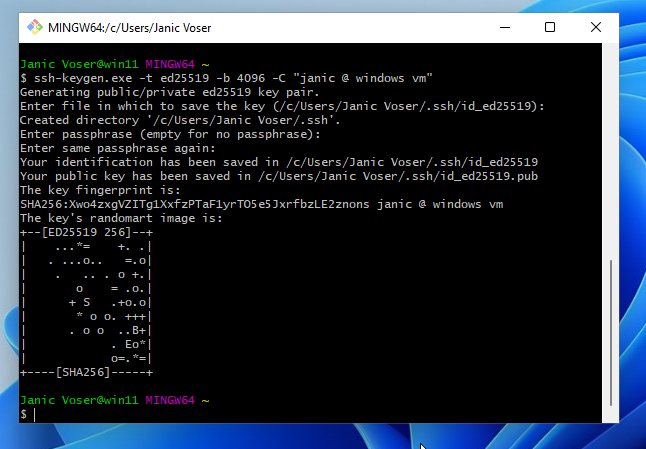
Generate an ssh-key
1. Open "Git Bash" and type the following command to create an SSH-Key
ssh-keygen.exe -t <type> -b <bit ammount> -c <Your identifing comment>
# For example
ssh-keygen.exe -t ed25519 -b 4096 -C "janic @ windows pc"
2. Now you are prompted to enter the path to the key. You can use the default. (just press enter and do not enter anything)
3. Now you are prompted to enter a password for your key. The default is no password. (just press enter and do not enter anything)
4. Now you are prmpted to confirm your password, if you have entered none, just hit enter again.
Always use your custom ssh-key
3. List the content of this directory with the command ls you should now see you custom key in here.
4. Create a config file which defines to always use your custom ssh-key you can use the command below
echo "IdentityFile ~/.ssh/<your ssh key>" > config
# For example:
echo "IdentityFile ~/.ssh/id_ed25519" > config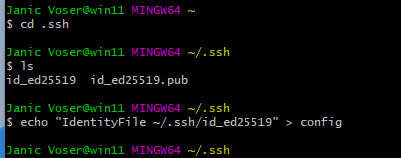
Add your Public SSH-Key to Gitea
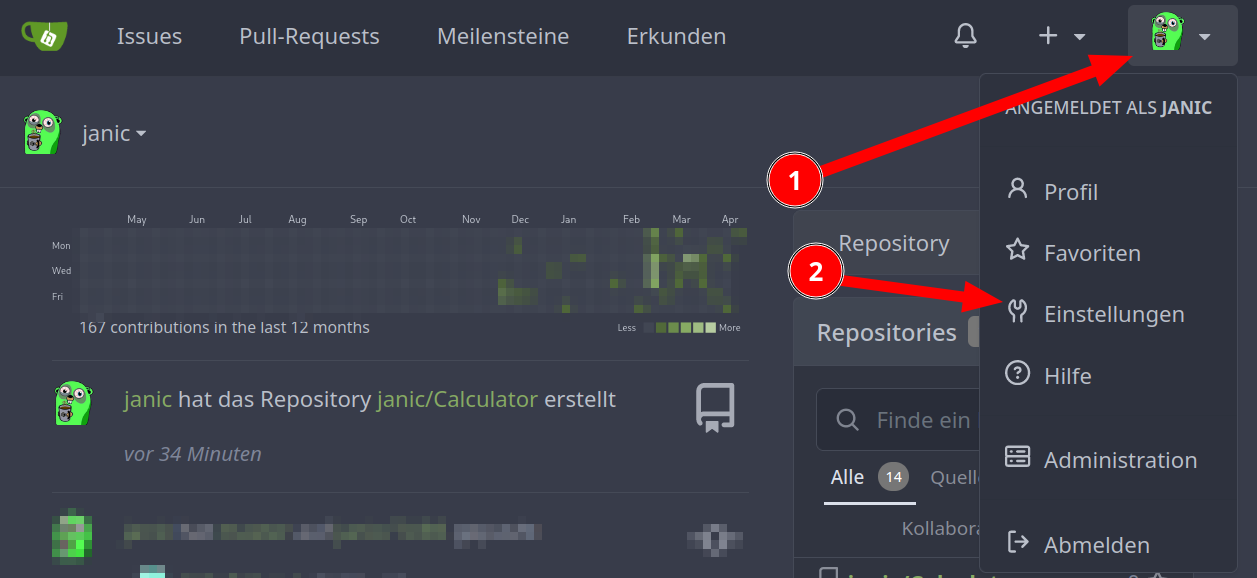
1. Login to your gitea account
2. Click in the top right on your profile and there on "Settings"
3. Get the content of your public key
You can use the cat command to open the content of the public key.
cat <your public key>
# For example:
cat id_ed25519.pub
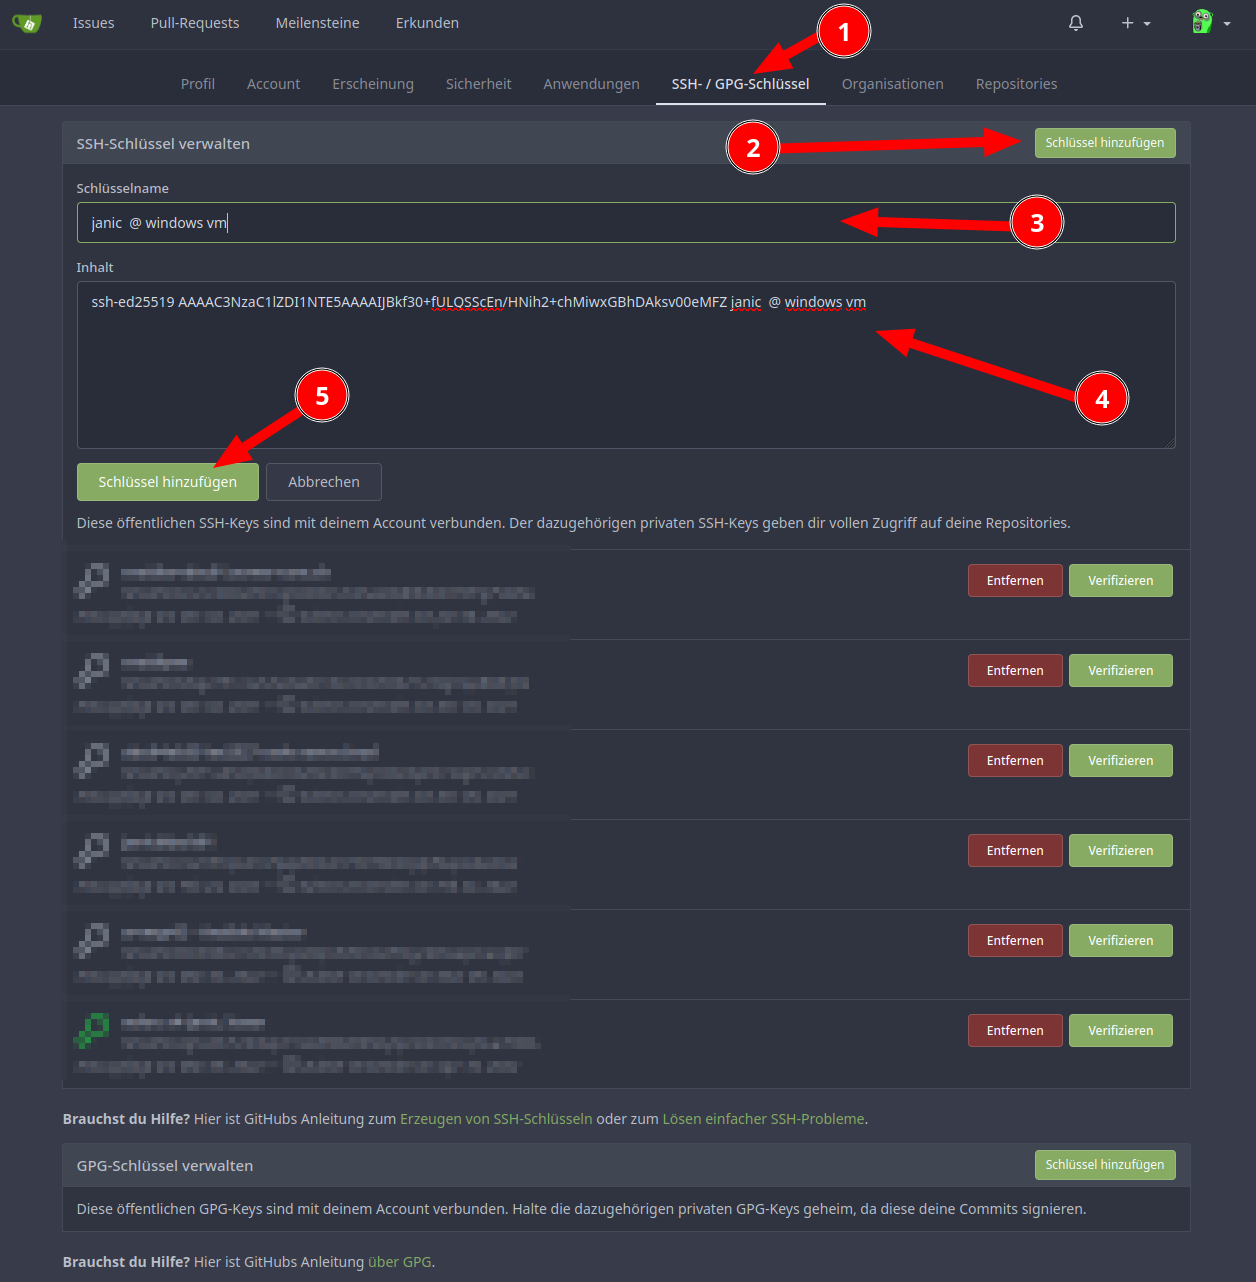
4.Follow the steps below
Go to "SSH- / GPG-Key"
Click on "add key"
Enter the name of this key
Enter the content of the public key
Click on "Add Key"
Configure Git
You need to set a default username and email for git. You can do this with the following commands
git config --global user.name "Name"
git config --global user.email "e@mail.com"
#For example:
git config --global user.name "Janic Voser"
git config --global user.email "janic@voser.cloud"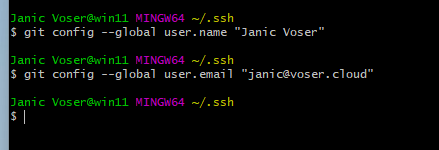
Your first steps with git
Clone your git repository
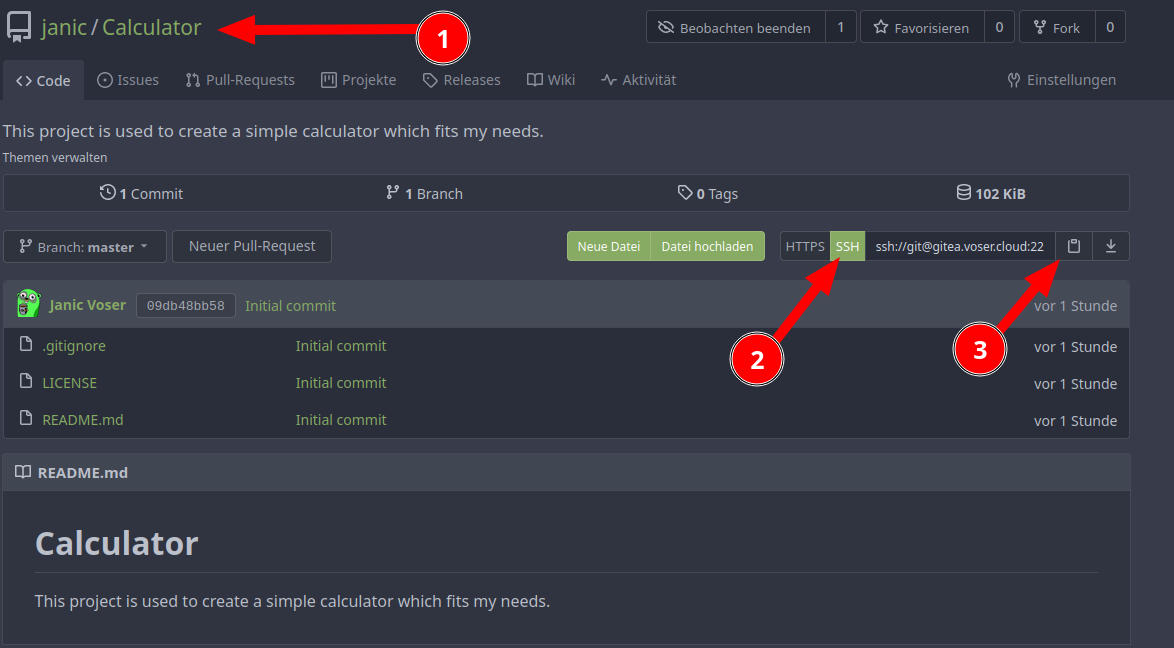
Get the git url
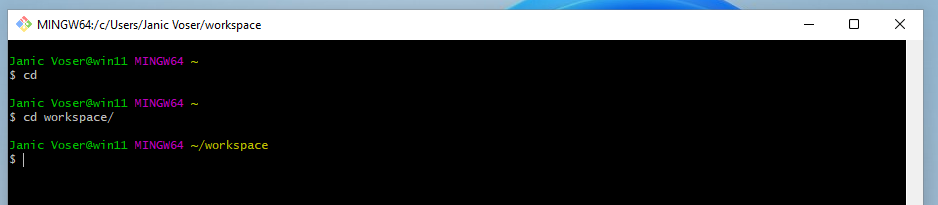
Navigate to your workspace
Clone the repository
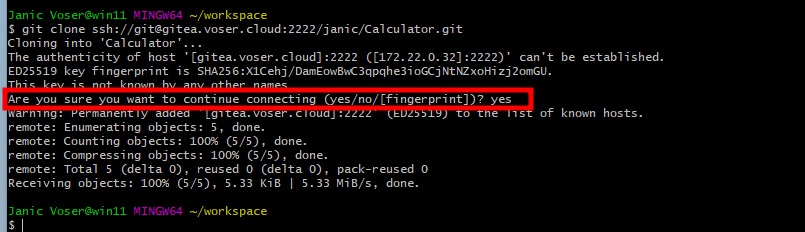
You can clone the repository by using the git clone command.
git clone <git url>
# For example:
git clone ssh://git@gitea.voser.cloud:2222/janic/Calculator.git
If you are prompted to accept to ssh-fingerprint type yes and hit enter
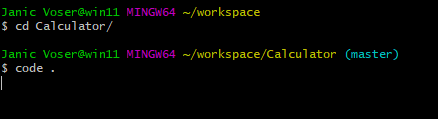
Open repository in your editor
Open this directory in VScode with the following command code .
In Visual Studio Code you need to trust the author of this repository.
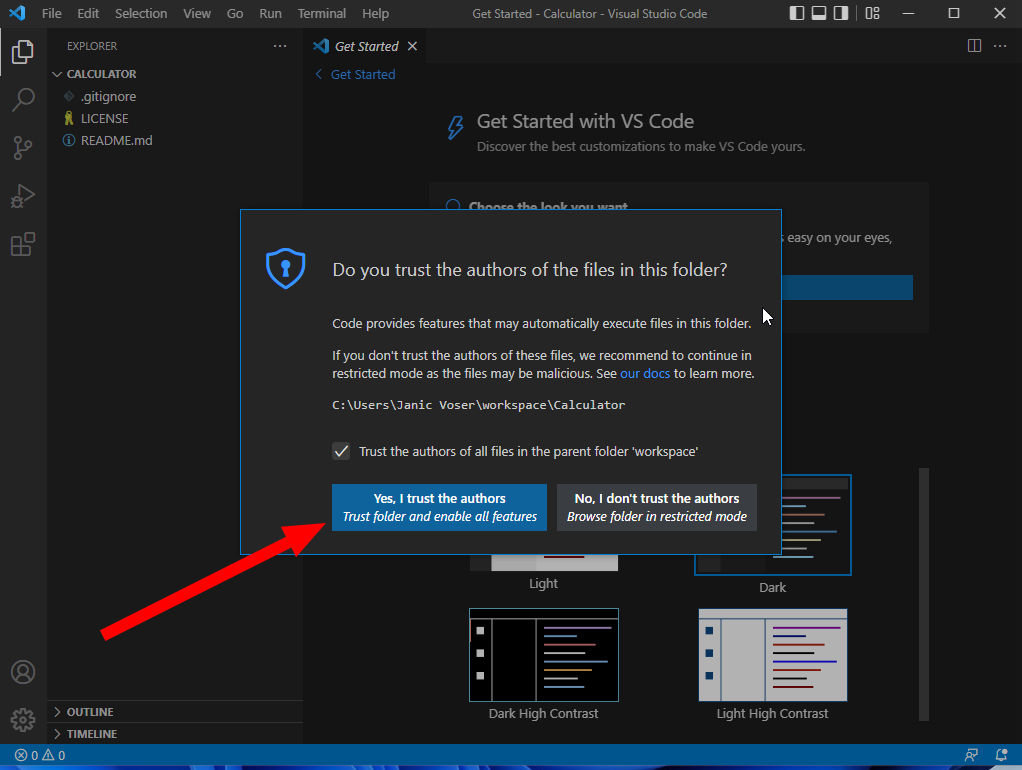
Afterwards you can see the Project folder on the left side. You can press <ctrl>+<b> to toggle this explorer view.
Edit a file
If you now edit a file you can see which lines you have modified.
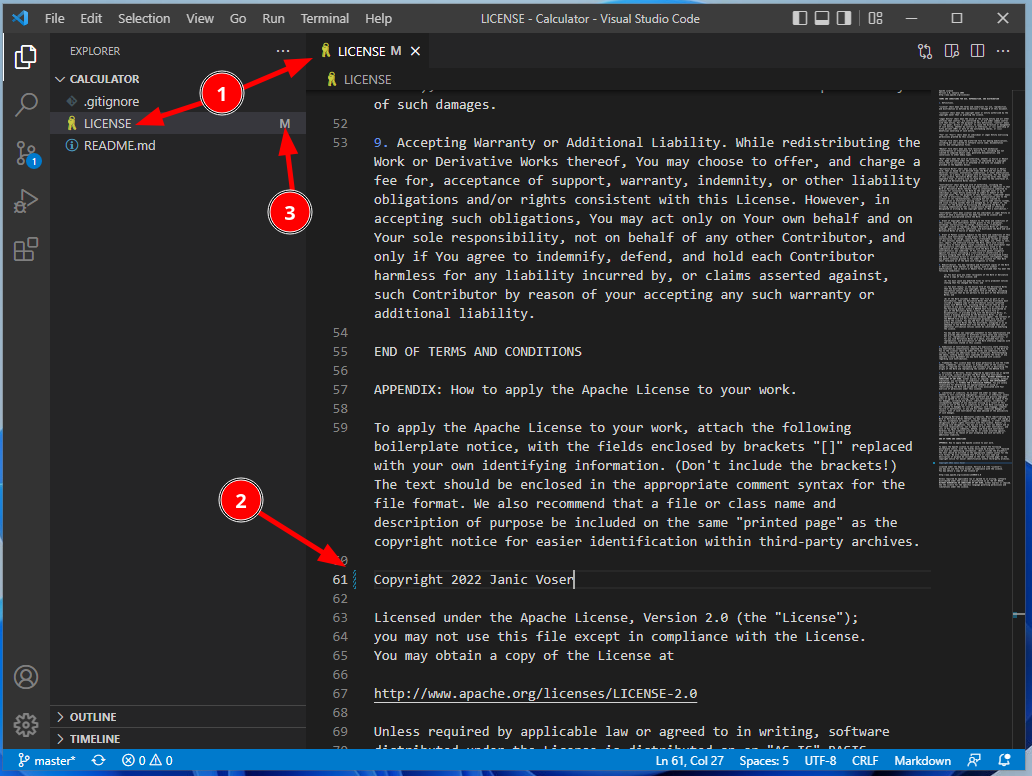
- Click on the file you want to edit.
- Edit the line, you will see a blue mark in the beginning of the line, if the line was modified.
- If you safe the file you will see an M on the end of the file, this is a visual indicator that the file got edited.
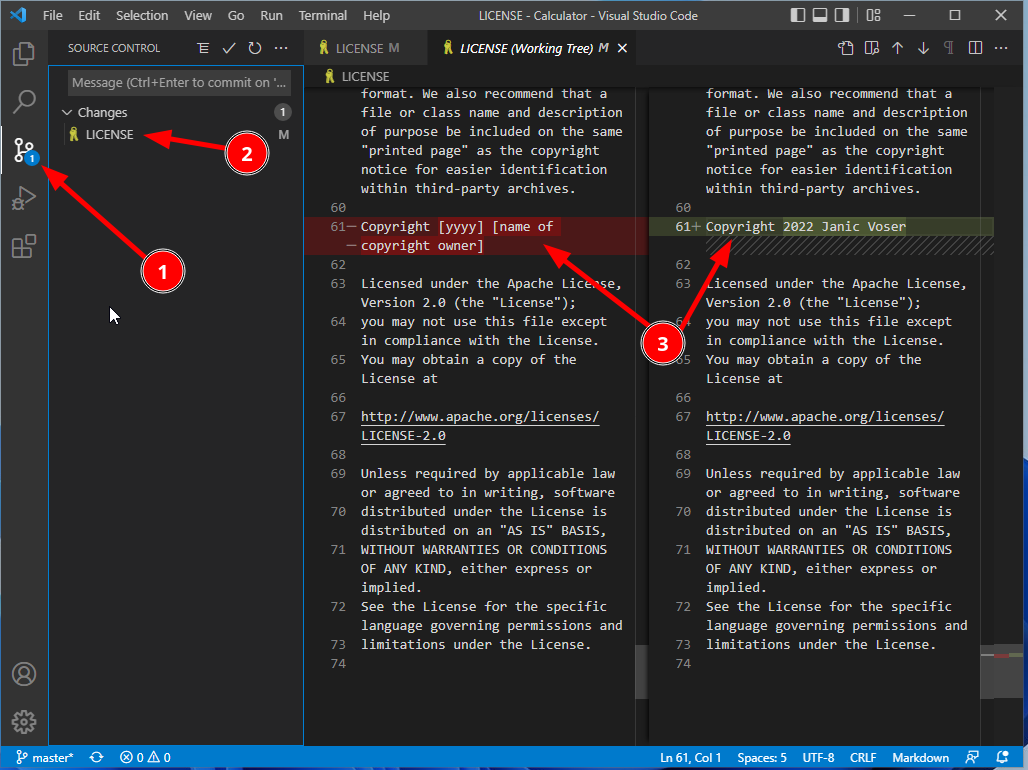
GIT Gui VScode
Changes
Add files to commit
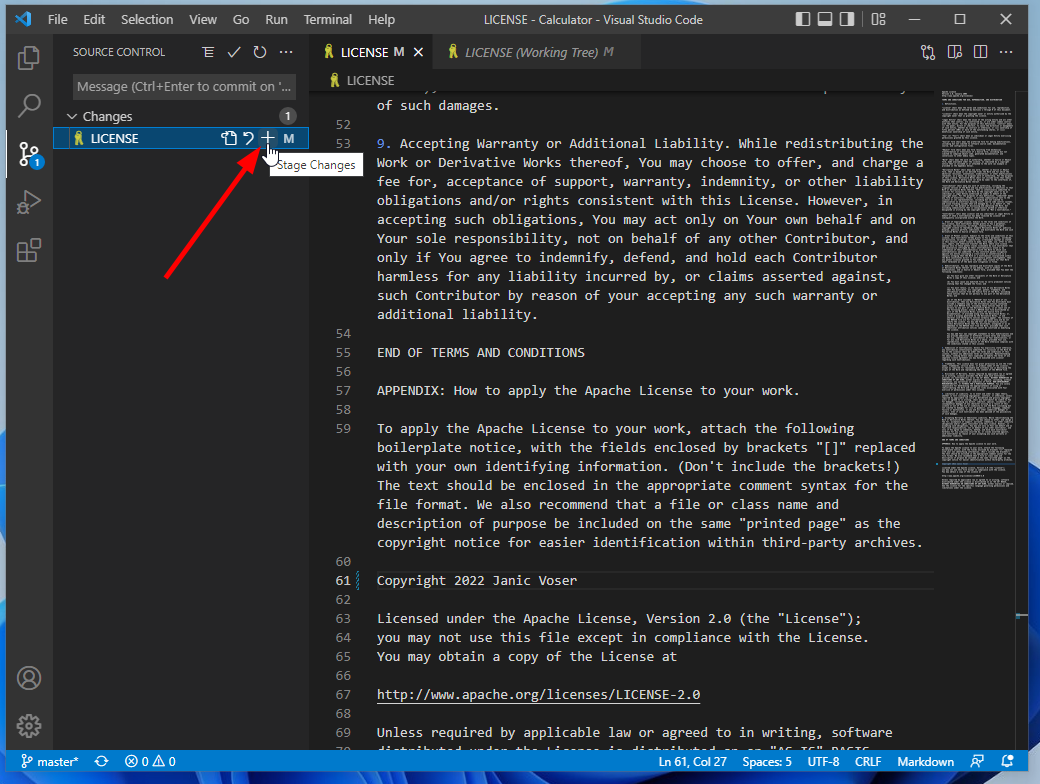
Click on the plus sign of the modified file.
Commit
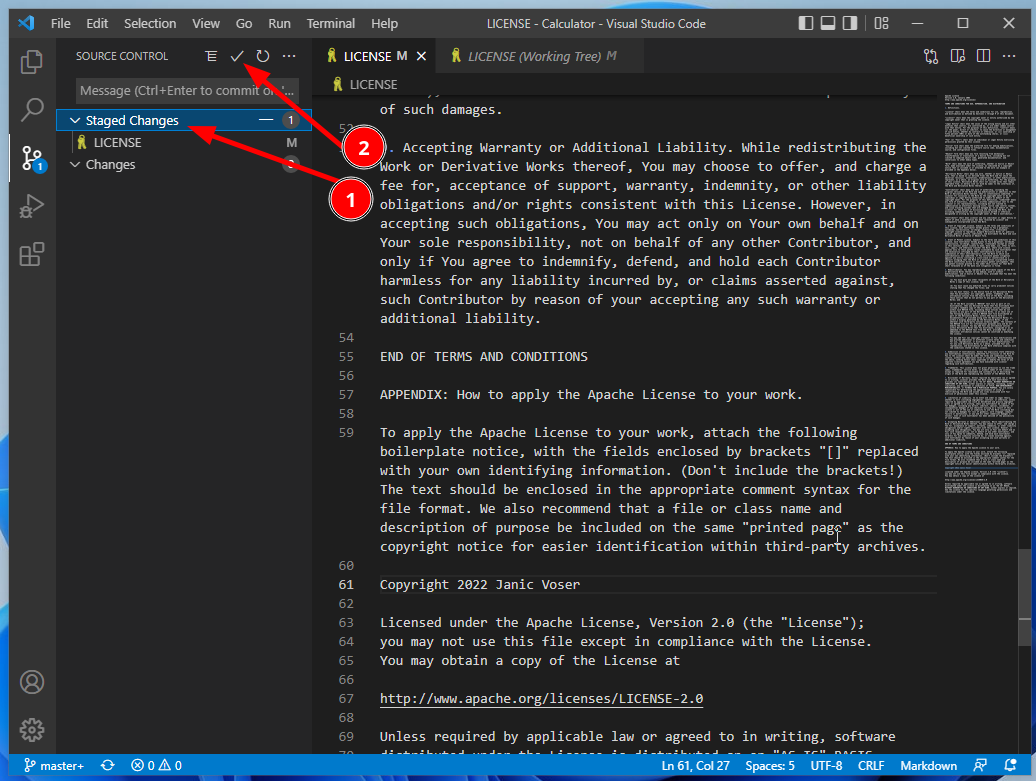
- Every file in the Staged changes gets commited with the same commit comment.
- Click on Commit to add the changes
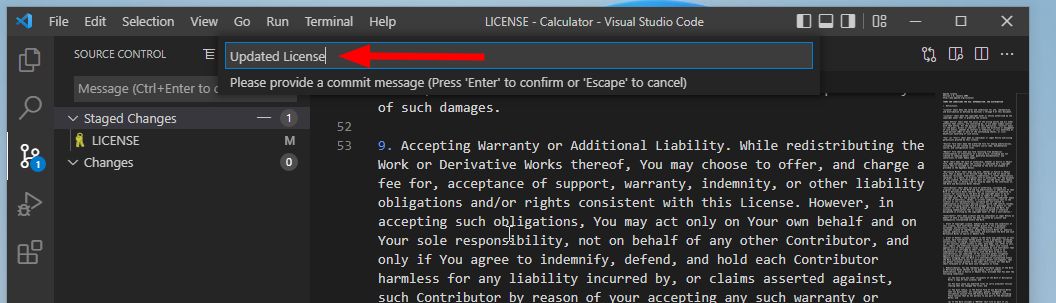
Enter a commit message which describes the changes
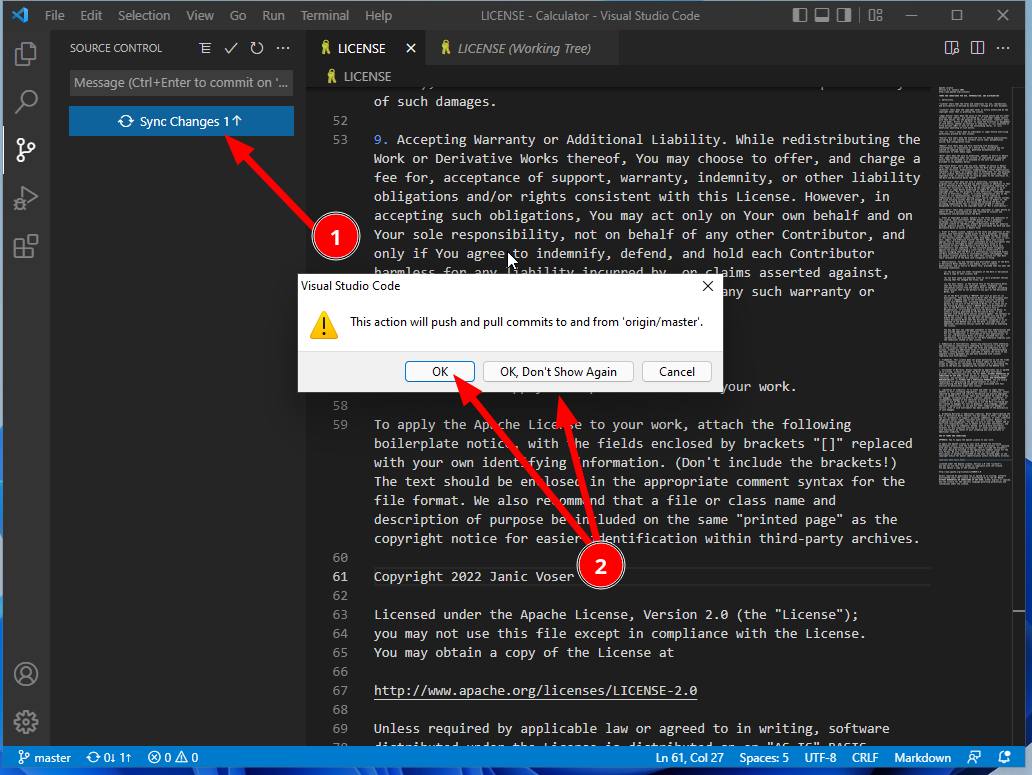
- Click on Sync Changes to push the changes to your remote git repository (gitea.voser.cloud or github.com or ...)
- Click ok to confirm the push.
Counter Check on website
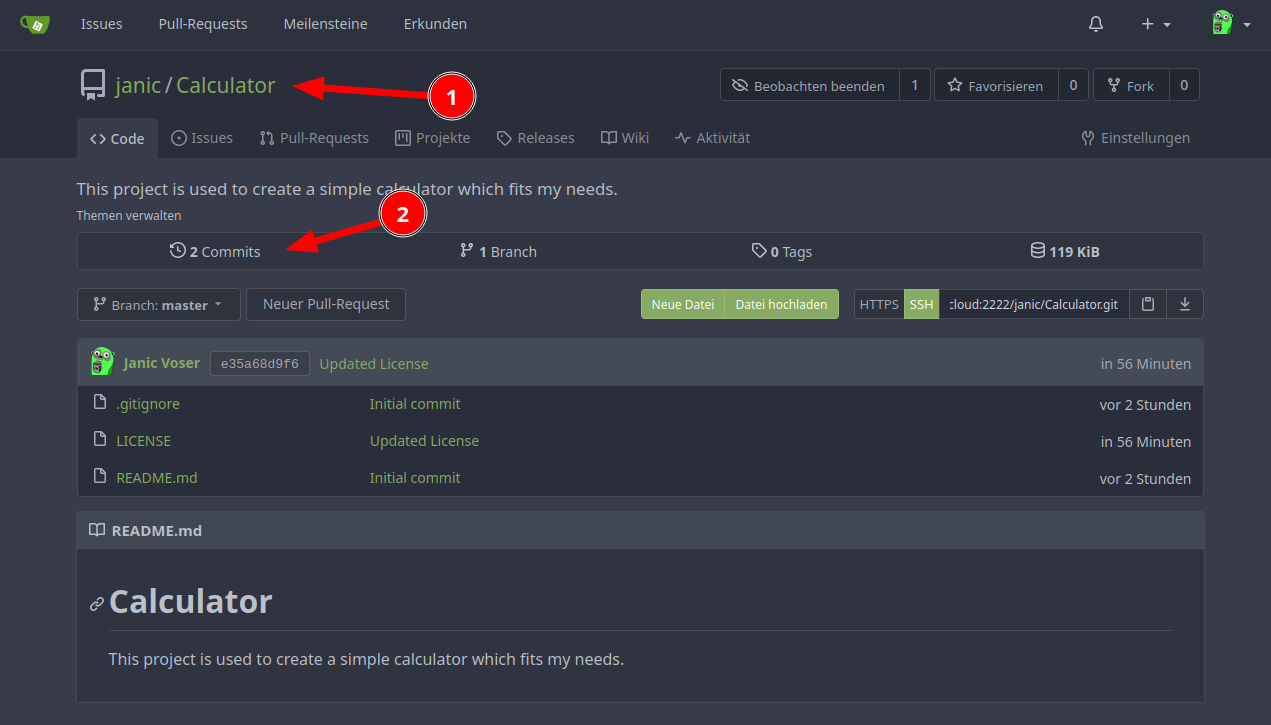
- Go to your Repository
- Click on Commits
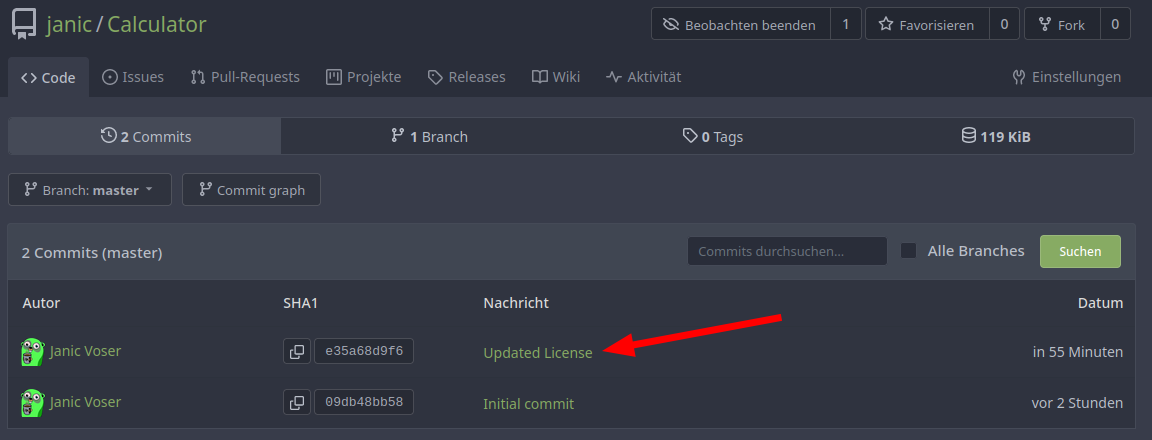
Now you can click on the commit
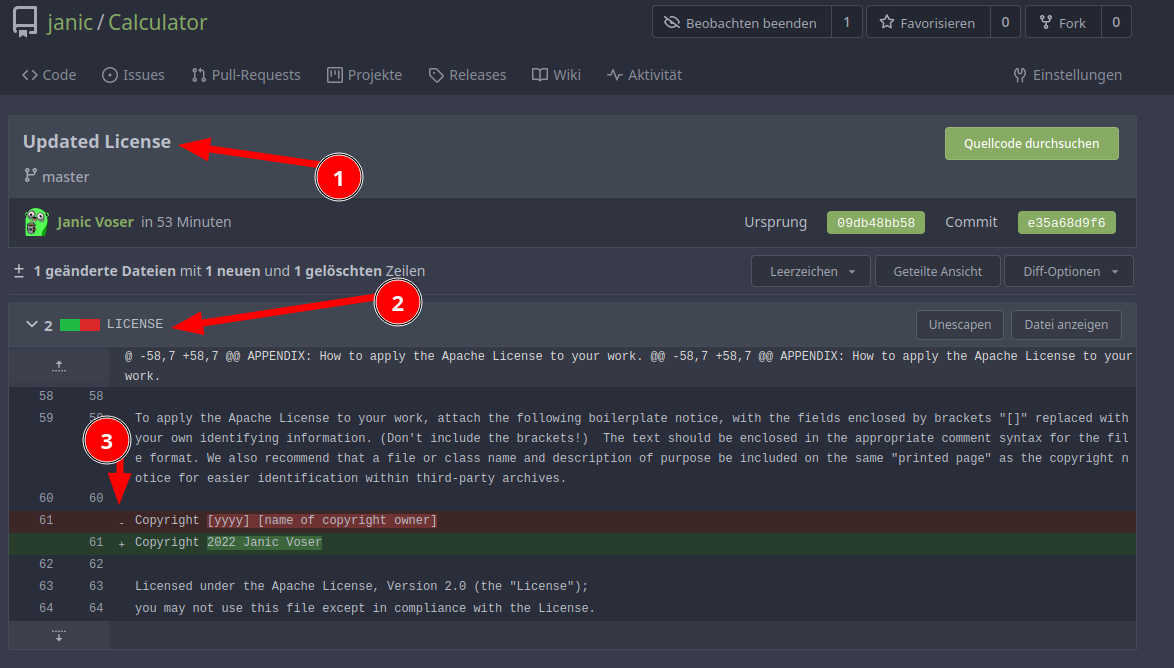
- Here you see the commit name
- Here are all edited files listed
- Here you can see the changed lines a plus(green) or minus(red) in the beginning of the line. Plus means this line was added, minus means this line was removed